

Movavi Slideshow Maker allows you to create a professional slideshow with your collection of pictures or unprocessed photos taken with your digital camera. It comes with basic editing tools for editing photos so you don’t have to download another image editing tool to edit them.
Upon launching the slideshow creator, you will notice that it is user-friendly and it has integrated all the features that you need on the welcome screen. On the welcome screen, you are given the fast track slideshow wizard option that allows you to create a slideshow in three easy to follow steps.
The slideshow wizard is for those who are not familiar with the program and need guidance on creating the slideshow. In step one, you must add your photos by either dragging them onto the empty space with the plus symbol or clicking on the +Files button to load the files.
You can also load pictures in multiple folders at one time by clicking the + Folders button. At the bottom, you can customize the slide duration, which is how long each slide will play. Rotate button allows you to can rotate your clip in clockwise direction.
In step 2, you are to choose a transition style for the slide. If you don’t want to use transition, you can choose the No Transition option. If you want, you can choose from one of the five transition styles including crossfade, random, simple, geometric and artistic. You can customize the transition duration by using the up and down arrow button.
In step 3, you can add music track to your slideshow. To add the music track, you simply drag it into the gray space or you can choose from the free tracks collection from the drop down menu. When you are done, you can click the Finish button and save the slideshow.
The full featured mode allows you to work on your slideshows in a timeline. You can load pictures and audio files by simply dragging them onto the timeline. Above the timeline, there are tools for editing the pictures such as scissor, rotate, crop, color adjustments and transitions.
To clip a picture, you must drag the red marker to the point where you want to cut and press the scissor button. If you press the rotate button, it will rotate your picture by 90 degrees. In the transitions tool, you can select from a long list of transitions such as barn door, blur in/out, crossfade, diffuse, fade to black, origami flaps, pinwheel, and gradient.
The color adjustment tool allows you to adjust the picture with auto saturation, contrast and white balance. The manual adjustment option allows you to adjust aspects that affect the coloration such as brightness, gamma, shadows, and highlights. If you click on the first tab on the left side bar, it will take you to the main screen where you can see add files button.
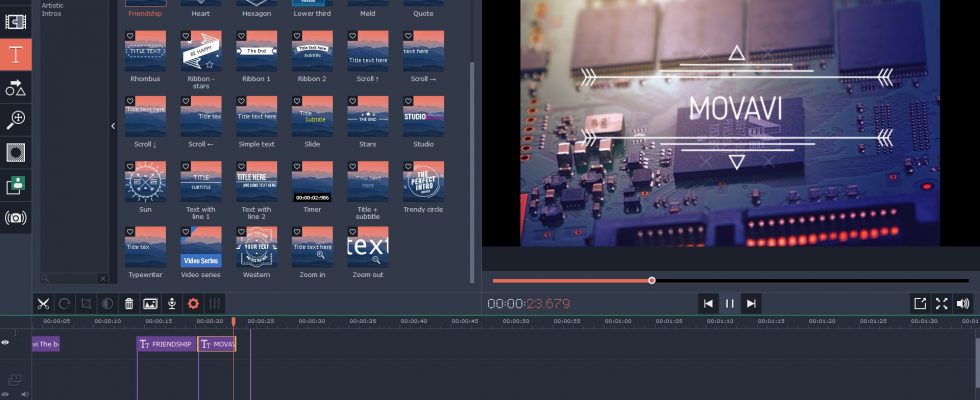
The T tab is where you can add animated text that floats across your picture to briefly describe the point that you are making with the slide. To add a title, you must drag it to the picture slide and double click on the purple text block in the timeline. Doing so allows you to edit the text in the preview area. Finally, when you are done creating the slideshow, you must not forget to press the Export button and save your slideshow.